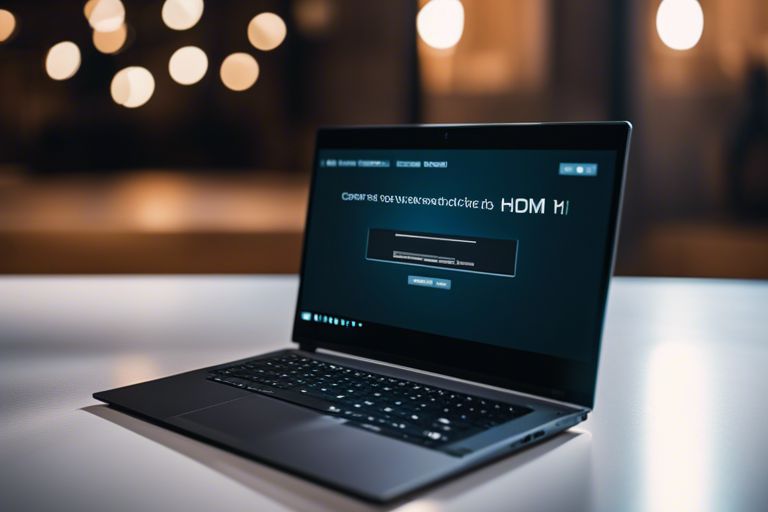
Many laptop users encounter HDMI connectivity issues on Windows 11, leading to frustration when trying to connect their device to external displays or projectors. In this comprehensive guide, we will walk you through the step-by-step solutions to troubleshoot and resolve HDMI not working on your Windows 11 laptop. By following these troubleshooting techniques, you can effectively fix HDMI connectivity issues and enjoy seamless multimedia display experiences.
Key Takeaways:
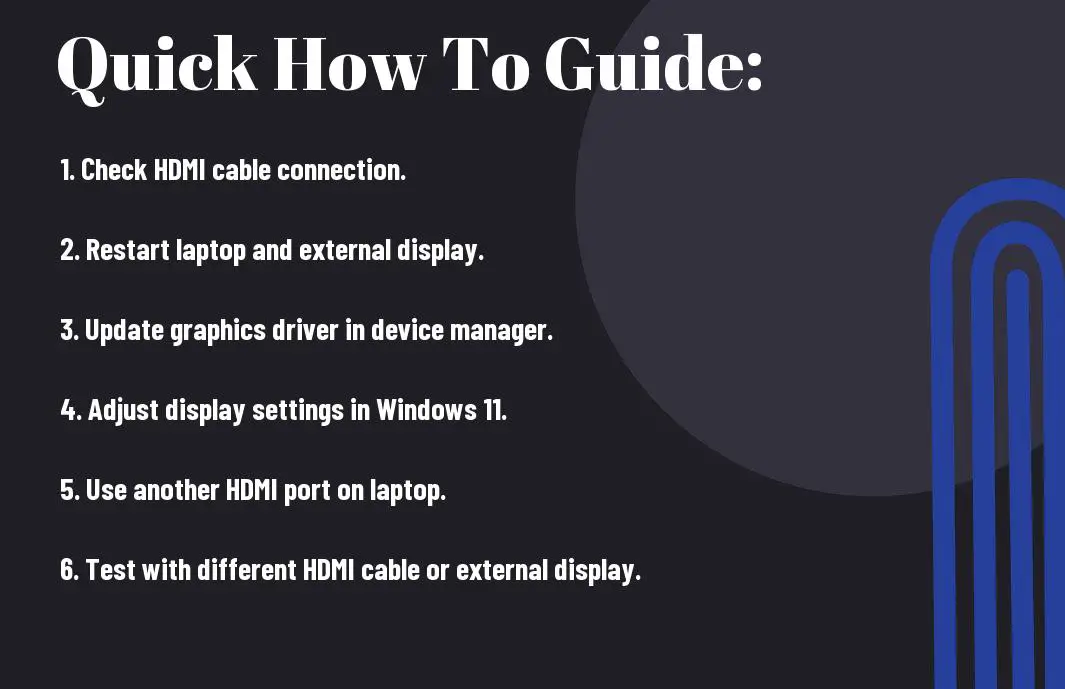
- Check HDMI Cable and Ports: Ensure that the HDMI cable is properly connected to both the laptop and the external device, and check for any physical damage on the cable or ports.
- Update Graphics Driver: Make sure the graphics driver on your Windows 11 laptop is up to date as outdated drivers can cause HDMI connectivity issues.
- Configure Display Settings: Adjust the display settings on your laptop to extend or duplicate the display through the HDMI connection to resolve any compatibility issues.
Preliminary Steps
Basic Troubleshooting Tips
Even though encountering HDMI connectivity issues can be frustrating, there are some basic troubleshooting tips you can try before venturing into more complex solutions. Make sure the HDMI cable is securely connected to both the laptop and the external display. Restart your laptop and the external display to reset the connection. Check the HDMI port for any physical damage or debris that may be obstructing the connection.
- Ensure HDMI cable is securely connected.
- Restart laptop and external display.
- Check HDMI port for damage or debris.
The successful connection of HDMI on a laptop can be influenced by various factors. Some common reasons for HDMI not working include outdated graphics drivers, incompatible hardware, or faulty HDMI cable. The issue may also stem from a misconfigured display setting on the laptop or the external display. Before exploring advanced solutions, it is vital to consider these factors that impact HDMI connectivity.
Factors Affecting HDMI Connectivity
- Outdated graphics drivers
- Incompatible hardware
- Faulty HDMI cable
With HDMI troubleshooting, assume that the drivers and hardware are primary suspects when facing connectivity problems. Make sure that your laptop’s graphics drivers are up to date and compatible with the external display. Check for any hardware issues such as a damaged HDMI port or a faulty cable that could be impeding the connection.
Tips
- Update graphics drivers regularly.
- Use high-quality HDMI cables.
- Check hardware for any damages.
Hardware Checks and Fixes
Inspecting HDMI Port and Cable
While troubleshooting HDMI connectivity issues on your Windows 11 laptop, it is crucial to start by inspecting the HDMI port and cable for any visible damage or debris. Dust or dirt in the port can hinder proper contact between the cable and port, leading to connection problems. Ensure both the port and cable are clean and undamaged to rule out any physical issues.
How to Resolve Hardware Malfunctions
Cable malfunctions can also be a common cause of HDMI not working on your laptop. Check for any visible signs of wear and tear such as frayed or bent pins on the cable. If the cable appears damaged, replace it with a new one to see if that resolves the issue. Additionally, try connecting a different HDMI cable to determine if the problem lies with the cable itself.
When faced with hardware-related issues causing HDMI not to work on your Windows 11 laptop, there are a few fixes you can try. Ensure that the HDMI cable is securely plugged into both the laptop and the external display. Restart both devices and try different HDMI ports on the TV or monitor. If the problem persists, consider updating your graphics driver or contacting technical support for further assistance.
Software Solutions
Updating and Rolling Back Drivers
Your HDMI connection issues on your Windows 11 laptop may be resolved by updating or rolling back your device drivers. Any outdated or faulty drivers can cause compatibility issues with your HDMI port, resulting in no signal or audio problems. To fix this, go to Device Manager, locate the display and sound adapters, right-click, and select ‘Update driver’ or ‘Roll back driver’ to ensure you have the latest and most compatible drivers installed.
Adjusting Display and Sound Settings in Windows 11
An effective way to troubleshoot HDMI not working on your Windows 11 laptop is by adjusting your display and sound settings. Any misconfigured settings can prevent the HDMI connection from establishing properly. Go to the Settings app, navigate to System, then Display and Sound, and ensure that the HDMI output is selected as the default playback and display option. Additionally, checking the resolution and refresh rate settings can also help in resolving connectivity issues.
Updating your display and sound settings in Windows 11 can potentially fix HDMI problems on your laptop. Make sure that the HDMI output is set as the default option, verify the resolution and refresh rate settings to ensure compatibility with your external display or audio device. Sometimes, a simple adjustment in these settings can make a significant impact on resolving connectivity issues.

Advanced Troubleshooting Techniques
- How to Use Windows Troubleshooters for HDMI Issues
- BIOS and Firmware Considerations
How to Use Windows Troubleshooters for HDMI Issues
On Windows 11, you can utilize built-in troubleshooters to resolve HDMI-related problems. Simply right-click on the Start button, go to Settings, then Update & Security, and finally Troubleshoot. Select the Hardware and Devices troubleshooter and follow the on-screen instructions. This tool can automatically detect and fix issues related to HDMI connectivity.
BIOS and Firmware Considerations
Clearly, the BIOS settings and firmware updates play a crucial role in ensuring proper HDMI functionality on your laptop. It is recommended to check for the latest BIOS updates on the manufacturer’s website and apply them accordingly. Updating firmware can address compatibility issues and enhance the overall performance of your HDMI connection.
Techniques for solving HDMI not working problems on Windows 11 laptops can range from utilizing Windows troubleshooters to checking and updating BIOS and firmware. By following these advanced troubleshooting methods, you can effectively address HDMI issues and enjoy seamless connectivity for your external display devices.
Preventing Future HDMI Problems
Best Practices for Cable Management
After ensuring your HDMI connection is working properly on your Windows 11 laptop, the next step is to prevent future HDMI problems. Proper cable management is imperative to maintaining a stable and reliable connection. Make sure to neatly organize and secure your HDMI cables to avoid any bending or twisting that could lead to signal interference.
Regular Maintenance and Updates
Clearly, regular maintenance and software updates are key to preventing future HDMI issues on your laptop. It is important to keep your Windows 11 operating system up to date, as well as any drivers related to HDMI connectivity. These updates often contain bug fixes and improvements that can help resolve compatibility issues and ensure smooth HDMI functionality.
Preventing future HDMI problems also involves regular system checks and maintenance to detect and address any potential issues before they escalate. It is recommended to periodically inspect your HDMI port for any dust or debris buildup that may affect the connection. Additionally, check for any physical damage to the cables or ports that could impact signal transmission.
Cable
Conclusion
Drawing together the troubleshooting steps provided above should help you resolve the issue of HDMI not working on your laptop running Windows 11. By checking cables, updating drivers, adjusting display settings, and configuring audio output, you can ensure a smooth connection between your laptop and external display devices. If the problem persists, consider seeking professional assistance to diagnose and fix any underlying hardware or software issues. With these solutions, you can enjoy seamless HDMI connectivity and enhance your viewing experience on a larger screen.
FAQ
Q: What should I do if HDMI is not working on my laptop running Windows 11?
A: If HDMI is not working on your laptop running Windows 11, you can try troubleshooting steps such as checking the cable connections, updating drivers, or adjusting display settings.
Q: How can I check the cable connections for HDMI not working on my laptop?
A: To check the cable connections for HDMI not working on your laptop, make sure the HDMI cable is securely plugged into both the laptop and the external display. You can also try using a different HDMI cable to rule out any issues with the cable itself.
Q: What should I do if updating drivers does not fix HDMI not working on my laptop?
A: If updating drivers does not fix HDMI not working on your laptop, you can try rolling back the display driver to a previous version or uninstalling and reinstalling the driver. You can also check for driver updates on the manufacturer’s website.
Q: How do I adjust display settings to fix HDMI not working on my laptop?
A: To adjust display settings to fix HDMI not working on your laptop, right-click on the desktop and select “Display settings”. Make sure the external display is recognized and set as the primary or secondary display. You can also try adjusting the resolution and refresh rate settings.
Q: What should I do if none of the troubleshooting steps fix HDMI not working on my laptop?
A: If none of the troubleshooting steps fix HDMI not working on your laptop, you can try connecting the laptop to a different external display to see if the issue is with the laptop or the display. If the problem persists, you may need to contact technical support for further assistance.